css3 :not(selector) selector

The :not(selector) selector is used for selecting elements that are NOT the specified element/selector.
it means that the condition matches every element that is NOT the specified element/selector.
syntax of :not selector
:not(selector) { style properties } 
Sample usage of the :not selector.
if you want a paragraph's background in green,
we would apply this
p
{ 
background:green;
} 

Assume you have a paragraph and two div,s in your page,
so you want to apply green background to all those elements that are not <p> element.
:not(p)
{
background:#ff0000;
} 

it tells browser that to select all elements that are not <p> element.
and to apply this style to all elements except <p> tags in webpage.

The :not selector is supported in all major browsers but  IE8 and earlier do not support the :not selector.

Here is some examples on using css3 :not() selector.

Select all elements that are not the specified element

:not(element)
{
…..
}

Example: :
:not(p)
{
background:green;
} 

All elements than <p> elements will be with a green background.

Select all elements that are not the elements with specified class.

:not(.classname)
{
…..
} 

Example: :
:not(.myClass)
{
background:green;
} 

All elements than the elements with a class of myClass will be with a green background.

Select all elements that are not the element with specified ID.

:not(#elementID)
{
…..
} 

Example: :
:not(#myDiv)
{
background:green;
} 

All elements than the element with an ID of myDiv will be with a green background.

Select all BUTTONS that are not DISABLED.

button:not([DISABLED])
{
…..
} 

Select all elements but NOT <element-tag>.

*:not(element-tag)
{
…..
} 

Example: :
:not(img)
{
background:green;
} 

All elements than the element  <img> will be with a green background.

Selects all HTML elements except links.

html|*:not(:link):not(:visited)
{
….
}

Selects all  elements that are not being hovered.

*|*:not(:hover)
{
…..
}

Selects all  <a> elements that are not with a base  HREF that holds specific URL .

a:not([href^="URL"]) 
{ 
----
} 

Example::
a:not([href^=http://aslamise.blogspot.com]) 
{ 
border: 1px solid green; 
} 

Selects all <a> elements that have a rel=”external”.

a[rel~="external"] 
{ 
…..
}

Selects all  elements that have a name=”name” attribute, but eclude one that contain “name”.

element[name*="name"]:not([name="name-that-not-to-removed"])
{
…..
}

on hover an element that doesn't have  the class “.class-name”

element-tag:not(.class-name):hover 
{
……
}

Example:
li:not(.active):hover
{
background:green;
}

If you are using jQuery  to apply css3 effect in your webpage, :not() elector will be more useful.


Read Article →

Best way to hide Email address in your website or blog from Spam bots - Google's mailhide


If you have a website or blog, it is necessary to put your email there to let visitors to contact you.
may be only in contact page or in every page.
But what if some bad bots searching websites for mail addresses in blogs or websites crawled into your website? yes. there is the problem that they will send you number of advt emails to your inbox.
if your mail server doesn't have an effective spam filter, things will get worse than that.
 you will be getting numerous mails each day that make your job difficult.

So, Whats the effective way to prevent spam bots to get your email address but to let your real visitors grab your email address so that they can contact you?

GOOGLE, the unstoppable king has the answer.
To hide your email address from bots,and let your visitors grab it after a simple captcha test, Google has a service named "MAIL HIDE"
Go make it today.
Go below address and get the code from there and put it whereever you want visitors to see the link to your mail address.

http://www.google.com/recaptcha/mailhide/


There you can see a text field  labled protect your mail.
Type your email address in it

You will be taken to next page after you click Protect it button.

There you can see two code blocks for you.
One is the text field which contain a URL to your protected email. you can make a link to that URL in your web page. shown in the figure below.


http://www.google.com/recaptcha/mailhide/d?k=01zI57-KPkSDVJEtubLfJaMw==&c=4GL32YEpIYeIqgdJWlqemLdYlQCJ7ElRa4KN3nHJOo8=


Next one is the HTML code we can put in our webpage, where visitor can click on the link and it will take them to your mail,protected with captcha


your<a href="http://www.google.com/recaptcha/mailhide/d?k=01zI57-KPkSDVJEtubLfJaMw==&amp;c=4GL32YEpIYeIqgdJWlqemLdYlQCJ7ElRa4KN3nHJOo8=" onclick="window.open('http://www.google.com/recaptcha/mailhide/d?k\07501zI57-KPkSDVJEtubLfJaMw\75\75\46c\0754GL32YEpIYeIqgdJWlqemLdYlQCJ7ElRa4KN3nHJOo8\075', '', 'toolbar=0,scrollbars=0,location=0,statusbar=0,menubar=0,resizable=0,width=500,height=300'); return false;" title="Reveal this e-mail address">...</a>@domain.com

Copy paste that code you see  into your web page where you want to display your email to visitors.

Below is screenshots of How it seen after implementation and how does it work.

User Sees a "you..@domain.com" on contact area.


User clicks on that . It will pop up a window,asking user to enter a captcha.


After filling and clicking on "reveal email address" button, it will show user the real email.


There are many methods out there, but i trust this one most. because it is provided by GOOGLE. whats more than that ;)

Read Article →

How to replace Blogger Comments with facebook Comment plugin In blog/website

Here is how you can replace blogger comments with Facebook Comments in blogger blogspot.


Before Proceed further, please note that
If you use Facebook comments instead of blogger comments,
  • You will not get email notifications when someone comment on your post.
  • You will not be able to track spam messages in comments with blogger service.
  • Comments you will receive, will not be added to your blog's comments section, but only in Facebook's iframe.

Still,If you want to use this, here we go.

First Step:

First step is to make an app in Facebook.
You should be an app developer to use Facebook comments in your website or blog or wherever you want.

To create a facebook app,
Go to below address.
https://developers.facebook.com/apps
If you are not yet a developer, register for a developer account.

Click on the button named "Create New app"

It will pop up a box. type your app name there. whatever it is. you can also name it as your blogs name.


Click next button, it will ask you to type captcha as Facebook requires that to prevent spamming.

Your app will be created and you will be taken  to a new page where you can see basic settings of your app.


Display name will be the same name you typed.
Now , type blogspot.com,blogspot.[your country specified domain extension.  example:if you are in India it will be blogspot.in].
You can complete the domain name list with country specified domain  extensions as possible.

Next, you can see a field named sandbox mode.

If Sandbox mode enabled, only developers can use the app. so disable sandbox mode. for that check the radio button named "disabled"

Now, come down and click on website with Facebook login, and fill it with http://yourblogname.blogspot.com

Mine will be http://aslamise.blogspot.com

Now click on save

You have just made your Facebook app to use Facebook's plugins.

Second Step:

Get code for Facebook Comments

Go to
http://developers.facebook.com/docs/reference/plugins/comments/


Grab your code from there.

<div id="fb-root"></div>
<script>(function(d, s, id) {
  var js, fjs = d.getElementsByTagName(s)[0];
  if (d.getElementById(id)) return;
  js = d.createElement(s); js.id = id;
  js.src = "//connect.facebook.net/en_US/all.js#xfbml=1&appId=YOUR_APP_ID";
  fjs.parentNode.insertBefore(js, fjs);
}(document, 'script', 'facebook-jssdk'));</script>

You have to XML encode code between script blocks to get it work on blogger,else it will show an error.
After XML encoded ,It will look like below.


<div id="fb-root"></div>
<script>
(function(d, s, id) {
  var js, fjs = d.getElementsByTagName(s)[0];
  if (d.getElementById(id)) return;
  js = d.createElement(s); js.id = id;
  js.src = &quot;//connect.facebook.net/en_US/all.js#xfbml=1&amp;appId=YOUR_APP_ID&quot;;
  fjs.parentNode.insertBefore(js, fjs);
}(document, &#39;script&#39;, &#39;facebook-jssdk&#39;));
</script>


(You can just copy paste this to your template just after the <body> tag and replace YOUR_APP_ID with your app id of the app you created.)

Save your template for now.
Now click Ctrl+F and search <b:includable id='postQuickEdit' var='post'>
Just before that you can see </b:includable>.
Now lets call our comment plugin here.

So Copy paste this just before that </b:includable>.


        <b:if cond='data:blog.pageType == &quot;item&quot;'>
<div class='fb-comments' data-num-posts='20' data-width='610px' expr:data-href='data:blog.canonicalUrl'/>
        </b:if>


Change the width of comment box as per your template's width.

Add <meta content='YOUR-FACEBOOK-ID' property='fb:admins'/> between your  <head></head> tags. So we can moderate comments in our blog.
We have just enabled Facebook comments plugin in your blog.

Now, the last step. 
we have to hide the real blogger comments plugin from our blog.

for that, go to your blog's dashboard.

Settings -> Posts and comments ->

Under Comments Section, you can see an option named Comments Location

Select Hide.

Note: Selecting Hide does not delete existing comments.

Then click save settings.


You have just replaced  your blog's default comment system with Facebook's comment system.
Feel free to ask if you are experiencing any problem with the process. your comments are always welcome :)


Read Article →

What is blogger in Draft & How to Change to Blogger in Draft

  • Blogger in draft is Blogger's beta server.
  • This server is used for testing new features before they integrate that features to main blogger server.
  • So if you decide to blog with blogger in draft, it will enable features than the main blogger server,with new function that is under construction or being reviewed.


How to Use blogger in draft?

The interesting thing is, anyone with a blogger profile can enable blogger in draft.
So you can too.

To Switch to blogger in draft,
Simply go to below address.

http://www.blogger.com/user-settings.do

OR

in blogger/home page, there will be  settings icon next to language drop down menu(New blogger interface)
Click on that button
And select edit user settings
It will take you to the page "http://www.blogger.com/user-settings.do".

There you can see   two sections named as General and Email Notifications

In general section, you can see a check box labeled "Use Blogger draft"

Tick it. Click on save button below.

You just moved to blogger's beta server from blogger server.
Now you can enjoy the pre-release features in all its glory.


Extras: At the time of writing this article, am using blogger in draft.
and there is an option to define/translate typed html in tools list. Which is not yet added to blogger.com's dashboard. ;)

happy blogging. feel free to start a discussion in comments :)

Read Article →

How to add a class to any element using jQuery or JavaScript


If you are a good web designer, you will always think of how to automate things without wasting our valuable time.
This is one of the question every web designer/web developer thinks of. how to automate things!

Here we will discuss about how to add classes to elements automatically on page load.
lets have a look at what are the benefits of assigning classes automatically.

  • Spend no time to add all classes by hand
  • Accuracy
  • Faster Page loads

jQuery's Basic syntax to add class is 
$("elementID").addClass("ClassName")
To use jQuery,you will have to add jQuery library between your<head></head> tags.
If you have not yet included jQuery in your webpages, its the time to do that. dont be afraid that the size of jQuery Script will affect your pageloading time,because it is less than 100 kb if minimized.(Smaller than a normal image i would say). 
To Call jQuery, find </head> tag in your code.then Copy and paste the below code just before that </head> tag.
<script src='//code.jquery.com/jquery-1.8.0.min.js' type='text/javascript'></script>

How to add a class to all "img" tags at a time using jQuery or JavaScript

Imagine that you have  many images in your website or blog.
and you want to automate the process of adding a class called "my-sample-class-for-all-img-tags" to all <img>  tags inside the document.

Add below code just before closing body tag (</body>).

jQuery Script for adding a class to all "img" tag in document:

<script type='text/JavaScript'>
jQuery('document').ready(function(){
$("img").addClass("my-sample-class-for-all-img-tags");
});
</script>

JavaScript Code for adding a class to all "img" tag in document :

<script type='text/JavaScript'>
var images = document.getElementsByTagName("img");
var i;
for(i = 0; i < images.length; i++) {
    images[i].className += " my-sample-class-for-all-img-tags";
}
</script>

Save,and you are done.
Next time when you refresh the output page, a class named "my-sample-class-for-all-img-tags" will be added to all img tags inside the webpage.

How to add a class to all pre tags at a time using jQuery or JavaScript

Imagine that you have  many pre tags in your website or blog.
and you want to automate the process of adding a class called "my-sample-class-for-all-pre-tags" to all <pre>  tags inside the document.

Add below code just before closing body tag (</body>).

jQuery Script for adding a class to all "pre" tag in document:

<script type='text/JavaScript'>
jQuery('document').ready(function(){
$("pre").addClass("my-sample-class-for-all-pre-tags");
});
</script>

JavaScript Code for adding a class to all "pre" tag in document :

<script type='text/JavaScript'>
var pres = document.getElementsByTagName("pre");
var i;
for(i = 0; i < pres.length; i++) {
    pres[i].className += " my-sample-class-for-all-pre-tags";
}
</script>

Save,and you are done.
Next time when you refresh the output page, a class named "my-sample-class-for-all-pre-tags" will be added to all pre tags inside the webpage.


How to add a class to all code tags at a time using jQuery or JavaScript

Imagine that you have  many <code> tags in your website or blog.
and you want to automate the process of adding a class called "my-sample-class-for-all-code-tags" to all <code>  tags inside the document.

Add below code just before closing body tag (</body>).

jQuery Script for adding a class to all "code" tag in document:

<script type='text/JavaScript'>
jQuery('document').ready(function(){
$("code").addClass("my-sample-class-for-all-code-tags");
});
</script>

JavaScript Code for adding a class to all "img" tag in document :

<script type='text/JavaScript'>
var codes = document.getElementsByTagName("code");
var i;
for(i = 0; i < codes.length; i++) {
    codes[i].className += " my-sample-class-for-all-code-tags";
}
</script>

Save,and you are done.
Next time when you refresh the output page, a class named "my-sample-class-for-all-code-tags" will be added to all <code> tags inside the webpage.


How to add a class to all div tags at a time using jQuery or JavaScript

If you want to automate the process of adding a class called "my-sample-class-for-all-div-tags" to all <div>  tags inside the document.

Add below code just before closing body tag (</body>).

jQuery Script for adding a class to all "img" tag in document:

<script type='text/JavaScript'>
jQuery('document').ready(function(){
$("div").addClass("my-sample-class-for-all-div-tags");
});
</script>

JavaScript Code for adding a class to all "div" tag in document :

<script type='text/JavaScript'>
var divs = document.getElementsByTagName("div");
var i;
for(i = 0; i < divs.length; i++) {
    divs[i].className += " my-sample-class-for-all-div-tags";
}
</script>

Save,and you are done.
Next time when you refresh the output page, a class named "my-sample-class-for-all-div-tags" will be added to all div tags inside the webpage.

How to add a class to all button tags at a time using jQuery or JavaScript

Imagine that you have  <button> tags in your website or blog.
and you want to automate the process of adding a class called "my-sample-class-for-all-button-tags" to all <button>  tags inside the document.

Add below code just before closing body tag (</body>).

jQuery Script for adding a class to all "img" tag in document:

<script type='text/JavaScript'>
jQuery('document').ready(function(){
$("button").addClass("my-sample-class-for-all-button-tags");
});
</script>

JavaScript Code for adding a class to all "img" tag in document :

<script type='text/JavaScript'>
var buttons = document.getElementsByTagName("button");
var i;
for(i = 0; i < buttons.length; i++) {
    buttons[i].className += " my-sample-class-for-all-button-tags";
}
</script>

Save,and you are done.
Next time when you refresh the output page, a class named "my-sample-class-for-all-button-tags" will be added to all <button> tags inside the webpage.

How to add a class to all input tags at a time using jQuery or JavaScript

Imagine that you have  <input> tags in your website or blog.
and you want to automate the process of adding a class called "my-sample-class-for-all-input-tags" to all <input>  tags inside the document.

Add below code just before closing body tag (</body>).

jQuery Script for adding a class to all "input" tag in document:

<script type='text/JavaScript'>
jQuery('document').ready(function(){
$("input").addClass("my-sample-class-for-all-input-tags");
});
</script>

JavaScript Code for adding a class to all "input" tag in document :

<script type='text/JavaScript'>
var inputs = document.getElementsByTagName("input");
var i;
for(i = 0; i < inputs.length; i++) {
    inputs[i].className += " my-sample-class-for-all-input-tags";
}
</script>

Save,and you are done.
Next time when you refresh the output page, a class named "my-sample-class-for-all-input-tags" will be added to all <input> tags inside the webpage.

How to add a class to all textarea tags at a time using jQuery or JavaScript

Imagine that you have  <textarea> tags in your website or blog.
and you want to automate the process of adding a class called "my-sample-class-for-all-textarea-tags" to all <textarea>  tags inside the document.

Add below code just before closing body tag (</body>).

jQuery Script for adding a class to all "textarea" tag in document:

<script type='text/JavaScript'>
jQuery('document').ready(function(){
$("textarea").addClass("my-sample-class-for-all-textarea-tags");
});
</script>

JavaScript Code for adding a class to all "textarea" tag in document :

<script type='text/JavaScript'>
var textareas = document.getElementsByTagName("textarea");
var i;
for(i = 0; i < textareas.length; i++) {
    textareas[i].className += " my-sample-class-for-all-textarea-tags";
}
</script>

Save,and you are done.
Next time when you refresh the output page, a class named "my-sample-class-for-all-textarea-tags" will be added to all <textarea> tags inside the webpage.

How to add a class to all span tags at a time using jQuery or JavaScript

Imagine that you have  <span> tags used in your website or blog.
and you want to automate the process of adding a class called "my-sample-class-for-all-span-tags" to all <span>  tags inside the document.

Add below code just before closing body tag (</body>).

jQuery Script for adding a class to all "span" tag in document:

<script type='text/JavaScript'>
jQuery('document').ready(function(){
$("span").addClass("my-sample-class-for-all-span-tags");
});
</script>

JavaScript Code for adding a class to all "span" tag in document :

<script type='text/JavaScript'>
var spans = document.getElementsByTagName("span");
var i;
for(i = 0; i < spans.length; i++) {
    spans[i].className += " my-sample-class-for-all-span-tags";
}
</script>

Save,and you are done.
Next time when you refresh the output page, a class named "my-sample-class-for-all-span-tags" will be added to all Span tags inside the webpage.

How to add a class to html tag on page load using jQuery or JavaScript

If you want to add a class to your <html> tag on pageload,Add below code just before closing body tag (</body>).

jQuery Script for adding a class to "html" tag

<script type='text/JavaScript'>
jQuery('document').ready(function(){
$("html").addClass("my-sample-class-for-html-tag");
});
</script>

JavaScript Code for adding a class to "html" tag

<script type='text/JavaScript'>
var htmltag = document.getElementsByTagName("html");
htmltag[0].className += " my-sample-class-for-html-tag";
</script>

Save,and you are done.
Next time when you refresh the output page, a class named "my-sample-class-for-html-tag" will be added to <html> tag.

How to add a class to body tag on page load using jQuery or JavaScript

If you want to add a class to your <body> tag on pageload,Add below code just before closing body tag (</body>).

jQuery Script for adding a class to "body" tag

<script type='text/JavaScript'>
jQuery('document').ready(function(){
$("body").addClass("my-sample-class-for-body-tag");
});
</script>

JavaScript Code for adding a class to "body" tag 

<script type='text/JavaScript'>
var bodytag = document.getElementsByTagName("body");
bodytag[0].className += " my-sample-class-for-body-tag";
</script>

Save,and you are done.
Next time when you refresh the output page, a class named "my-sample-class-for-body-tag" will be added to <body> tag.

How to add a class to an element with specific class on page load using jQuery or JavaScript

If you want to add a class to an element with specific class on pageload,Add below code just before closing body tag (</body>).

jQuery Script for adding a class to an element with specifc class.

<script type='text/JavaScript'>
jQuery('document').ready(function(){
$(".existing-class-name").addClass("my-sample-class-for-element-with-a-class-of-existing-class-name");
});
</script>

JavaScript Code for adding a class to an element with specifc class.

<script type='text/JavaScript'>
var classes = document.getElementsByClassName("existing-class-name-to-find");
var i;
for(i = 0; i < classes.length; i++) {
    classes[i].className += " my-sample-class-for-all-elements-with-class-of-existing-class-name-to-find";
}
</script>

Save,and you are done.
Next time when you refresh the output page, a class named "my-sample-class-for-all-elements-with-class-of-existing-class-name-to-find" will be added to all elements which was having a "existing-class-name-to-find" class.


Important Notes:

  • Dont forget to include jQuery library before you experiment with jquery sample codes above,a small description on how to add jQuery to your page is explained in the beginning of this article.
  • Dont forget to replace class names and tags with your own classnames which you used in your blog or website.

Press ctrl+D to bookmark and Please leave your comments and thoughts below :)


Read Article →

blogger blogspot redirection to country specified domain extention and SEO problem - Explained


If you are curious about your blogspot.com sub-domain you registered with a blogspot."com" suffix redirects to your country specified domain suffix?
In simple, do you wonder why your "youraddress.blogspot.com" redirects to "youraddress.blogspot.in" , "youraddress.blogspot.se" or "youraddress.blogspot.+any country specified suffix" ?

Please have a look at address bar above. what you see is my blogspot subdomain+country specified suffix.
If you are a visitor from india, then it might be "http://aslamise.blogspot.in/" in your address bar.

Does it really matter? Does this thing prevent our blog from getting higher page rank in Google?
After reading this Article, you will be able to understand everything about whats happening out there. :)

Do you know what are domain suffixes?

As Defined in Wikipedia
A top-level domain (TLD) is one of the domains at the highest level in the hierarchical Domain Name System of the Internet.[1] The top-level domain names are installed in the root zone of the name space. For all domains in lower levels, it is the last part of the domain name, that is, the last label of a fully qualified domain name. For example, in the domain name www.example.com, the top-level domain is .com (or .COM, as domain names are not case-sensitive). Management of most top-level domains is delegated to responsible organizations by the Internet Corporation for Assigned Names and Numbers (ICANN), which operates the Internet Assigned Numbers Authority (IANA) and is in charge of maintaining the DNS root zone.
Blogger.com's suffix or top-level-domain is ".com".

So here we go. what are country specified suffixes? you might have the answer.
if it is in India, its ".in"
As blogger is a part of Google and they are unstoppable , they own almost top-level-domains in the internet for their websites. Our blogspot.com is one of them.
So when a user access our sub domain in blogspot.com from his country, blogger server automatically redirect it from server itself.
Be happy that you are in care of a master if you are using blogger to blog, and you own much top-level-domain-names for your sub-domain.
and your blog will never be down.

Does this blogger redirect thing matter in Google search and page rank?

NO. absolutely this doesn't matter any SEO for blogger blogspot blogs/sub-domains.
Because blogger automatically push the canonical link to blogger blogs.

For example, if i am redirecting to http://aslamise.blogspot.in even if i try to visit http://aslamise.blogspot.com,
blogger will push this to my blog.

<link href='http://aslamise.blogspot.com/' rel='canonical'/>
This tells the browser and bots that 'Original link is http://aslamise.blogspot.com and go fetch it.".

A canonical page is the preferred version of a set of pages with highly similar content.

So search bots will search them and fetch them instead of http://aslamise.blogspot.com instead of http://aslamise.blogspot.in.

If you cant see a <link href='http://yourblog.blogspot.com/' rel='canonical'/>in source code of your blog's homepage, it says that you edited your blog's template or its a third party template which doesn't pull blogger information properly.

If you cant see then, Lets solve the rel='canonical' issue in your blogger template!


  • Go to www.blogger.com
  • Sign in with your account
  • Take Edit Template option
  • Find <head> tag in your template by searching(Ctrl+F)


  • Add below line after the <head> tag.

<b:include data='blog' name='all-head-content'/>


  • Save your template and Now you are done.


Check again in source code of the homepage whether canonical link displays or not.

Hope you enjoyd and understood this article.
If you have any questions, please ask me in comments :)


Read Article →

If, else, and elseif Statements in blogger template


Have you ever thought that editing blogger template is that easy if we know the basics of coding?
even if we have no such programming skills or just want to experiment,you will need to learn how "if else" statements works in blogger templates.

After reading this article, you will be able :

  • To Understand the basics of if else statements in blogger templates and widgets.

  • To give multiple condition to an if statement.

  • To Understand how blogger conditional tags works inside blogger's server.

  • To understand how easy it is to learn blogger's <b:if/> <b:else/> conditions.

But you should know that there is no method to call if else statements like in php or any other language just by calling something like this.

if (condition)
{
Condition is true - now Do something.
}
else
{
condition is not true - now Do something.
}


you know what are <b:if> <b:else> tags  in blogger templates ?
Yes, these are simply like if else statement.
You can use the b:if and b:else tags to display content in specific pages as per your conditions.
if you want to display your logo only on your homepage in blogger, then you can show it only on homepage by specifying the condition.

You can use the b:if and b:else tags to execute javascripts only where you wish to execute.
You can prevent executing javascript in a specific post or in homepage of your blog itself, just by passing an if else condition in your template.

Before further reading, please have a look at This post about blogger conditional tags, http://aslamise.blogspot.in/2012/12/all-blogger-conditional-tags.html that will help you to capture the syntax.

  • Blogger's if else condition's general syntax of use.


<b:if cond='condition'>
   [here goes the content to display if condition is true]
<b:else/>
   [here goes the content to display if condition is false]
</b:if>


For an example, if you want to display a text "Welcome to My Homepage!" on your homepage only,then the code goes like this.

<b:if cond='data:blog.url == data:blog.homepageUrl'>
<h1>Welcome to My Homepage!</h1>
</b:if>


If you are confused about what the above code does, i will explain to you

<b:if cond='data:blog.url == data:blog.homepageUrl'>
//This code lets blogger server to Check whether the current page url matchs homepage url.
//If i use it my blog, it will be executing like this <b:if cond='data:blog.url == "//aslamise.blogspot.com"'>
<h1>Welcome to My Homepage!</h1>
//Here goes the code to display if it is homepage.
</b:if>
//If condition Ends. Execution completed.


The <b:else/> tag is optional tag. Without a <b:else/> tag, the result will be either the content listed in the b:if section or simply nothing.

<b:if cond='data:blog.url == data:blog.homepageUrl'>
<h1>Welcome to My Homepage!</h1>
<b:else/>
<h1>This is not my homepage</h1>
</b:if>

So,You might have understood how to setup if or else conditions in blogger template,

Now, we should be knowing how to execute Multiple conditions in blogger template.
Multiple conditions means, you want to check whether all conditions are true, and not only one condition

<b:if cond='condition 1'>
<b:if cond='condition 2'>
[here goes the content to display if condition1 and then condition2 are true]
</b:if>
</b:if>


The <b:else/> tag is optional tag but The closing </b:if> is required. and if you dont close these conditional tags properly, blogger template will show errors.

Please Note that there are blogger conditional tags that we can use Globally ,Page Header,Blog Posts,Blog Archives,Profile,Text / HTML / JavaScript,Feed,Picture,Labels,List,Link List, or in Logo.

Some data tags are simply true/false values on their own, e.g. "allowComments" on a post.
With other pieces of data, you can compare them with specific values to get a true or false.
Here are some examples:

<b:if cond='data:post.showBacklinks'> True if the current post is set to show backlinks.(Apply only in blog posts)
<b:if cond='data:blog.pageType == "item"'> True if the current page is an item page (post page).
<b:if cond='data:displayname != "Aslam"'> True if this is not Aslam's display name.
<b:if cond='data:post.numComments > 2'> True if the current post has more than one comment.(Apply only in blog posts)
<b:if cond='data:post.numComments < 2'> True if the current post has less than one comment.(Apply only in blog posts)


Read Article →

Facebook Graph Search - Basics you should know


In this very article, you will learn how to enable Facebook graph search and how to experiment its various features.

Graph search allows us to find things very quick than before, but don't think it as Google search engine,. because Google search engine is for all webpages in world wide web, but graph search is mainly focusing on search inside Facebook. that is the difference between Facebook graph search  and Google search.

OK, lets get started. For that, if you have not yet enabled graph search functionality in your Facebook account, its the time to enable it.

For that, Go to This link.
https://www.facebook.com/about/graphsearch    (opens in a new window).

Don't close this page now, here is the next steps to make it to work.
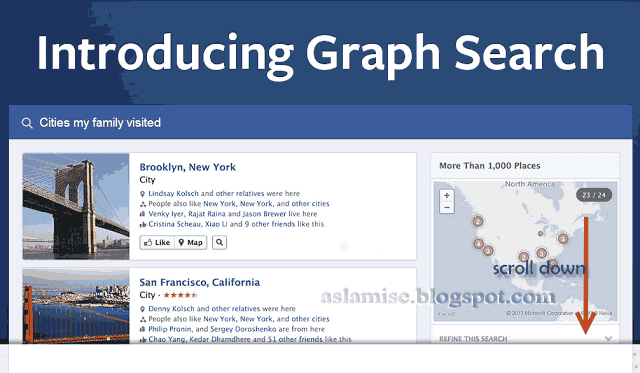
The new opened page will be titled as "Introducing Graph Search".

Scroll down. then you can see a live demo for graph search as a slide show.

you can click on "Try a search" link to see a demo of graph search that related to you.

The main advantage of Facebook graph search they claim that it will be unique for each user. and really it is.
Other people will see different results for the same search.

NOW, to start using graph search, Click on "Try Graph Search" button .


It will take you to your Facebook homepage where graph search is enabled.

If it opens a dialogue box which saying "Thanks for signing up for our beta . When graph search is ready you will see an announcement on Facebook and you can switch to the new experience."
Then you'll have to wait a few days to see that announcement on your Facebook homepage.
After that announcement appears, you can switch to new graph search.

From now, your Facebook homepages top blue bar will be like this.

When you click on that field, it will be showing up some suggestions like,

  • My friends
  • Photos of my friends
  • Restaurants nearby
  • games my friends play
  • Music my friends like
  • Photos i have liked


Click on any suggestion, or write your own query, here we are going to search for my friends.

So it will be showing all your friends as a grid list and also with some advanced search controls.

If you are having problem then click on this link, as it will be showing your friends

https://www.facebook.com/search/me/friends

At the right side of the same page,there will be more advanced tools to refine your Facebook graph search.


  • Gender
  • Relationship
  • Employer
  • Current City
  • Hometown
  • School
  • Friendship


If you select Male from gender option, this search results will only include male friends.
and if you select female from gender option, it will only include female friends.


Now lets come to Relationship


  • Single
  • In a Relationship
  • In an Open Relationship
  • Married
  • Engaged
  • It's Complicated
  • Widowed
  • Separated
  • Divorced
  • In a Civil Union
  • In a Domestic Partnership


Selecting each will give you result of the friends who has the selected combination.


These Filters are categorized as.

  1. Basic
  2. Work and Education
  3. Likes and interests


That is all for basics of graph search of facebook

As default, graph search will return results as a list.
if you want to see results as grid, you can switch to that by clicking on "View Grid" option on top right side of the same page.

or you can set it by going this URL

https://www.facebook.com/search/me/friends?source=view&view=grid

and to go back to list view, you can click on list view or by going this url.

https://www.facebook.com/search/me/friends?source=view&view=list


If you see the button "Join waiting list"  instead of  "Try Graph search" it means that you have to wait few more days to get in to. So click and wait, when the time comes, Facebook will notify about this.


Stay updated and Share your thought in comments. More detailed articles are coming with tricks with graph search.

Read Article →

Center Align an image or div inside another div

To center position an image or div inside another div or exactly in the main page container, we can use CSS.

You might be aware of text-align:center; Css code will do the trick if you only need to position an image or another div inside a big div horizontally (right to left).
But for vertical alignment, it would be a problem.

Solution 1:


If you are trying to display an image inside another div exactly in center, you could set it as the background image and align it to center of the div.

For Example.
Assume that You have a div with id #BigDiv.
and you want to set an image named "myimage.jpg" exactly inside that div with "200" pixels in width, and "200" pixels in height.

Here is the CSS code that might do the trick.

#BigDiv {
background:url(myimage.jpg) no-repeat center center; height:200px; width:200px;
}


One knowing disadvantage of this problem is its not as SEO/reader friendly ,if you could use image src, you can also call alt attribute to make it SEO/reader friendly.

Solution 2:


First we will set our larger div's position as relative.

#BigDiv{position:relative;}

Then we assign a class name for our image. ie.

<img src= "myimage.jpg" class='myimage'/>

Then rest Css Code

.myimage{
position:absolute;
top:50%;
left:50%;
margin-top:-25px;
margin-left:-25px;
}


This works only if we know the dimensions of both the image and the containing div.
Here,our margins are negative half of the size of the image.


Solution 3:

Assume that you know the size of container div and you dont know the dimensions of images.
If you are working with a light-box,or image carousels,it will be useful.
Our container div has the id as #BigDiv

#BigDiv
{
display:table-cell;
vertical-align:middle;
height:200px;
width:200px;
}
img
{
 /*Apply any styling here*/
}


Solution 4:


Another nice solution that might work is to create a table with valign.
This would work even if you know div's height or not.

<div>
<table width="100%" height="100%" align="center" valign="center">
<tr>
<td>
<img src="myimage.jpg" alt="myimage" />
</td>
</tr>
</table>
</div>

But it will be good if you use css solution wherever possible.


Read Article →

Open new window with javascript simple tutorial

In this tutorial, you are going to learn how to open a new window with javascript.
It will be useful if you decide to show preview of something,or to open on a buttonclick.
Basic code looks likes this ->

window.open(URL,name,Attributes) ;

Where URL is your specified URL to open,  name is the title or name for the tab,attributes are the optional attributes we can use.
Optional Attributes are

  • width = 300 


You can specify width of the new window. it can be any.

  • height = 400  


You can specify height of the new window. it can be any.

  • resizable = yes or no / 0 or 1 


This resizable attribute can be used to control whether you want the window can be resized or not.

  • scrollbars = yes or no / 0 or 1


This attribute can be used to show or hide scrollbars on the new window.

  • toolbar = yes or no / 0 or 1


It can be used to show or hide toolbar in the new window, toolbar is where your browser's back,forward,reload buttons appears,

  • location = yes or no / 0 or 1


To show or hide location,url box,or where the address of page appears.

  • directories = yes or no / 0 or 1


To show or hide extra tools on ur browsers toolbar.

  • status = yes or no / 0 or 1


To show or hide status bar at the bottom of th window .

  • menubar = yes or no / 0 or 1


To show or hide menubar of your browser. file ,edit, etc.

  • copyhistory = yes or no / 0 or 1


To copy history of old window to new window, or not.
<form> <input type="button" value="New Window!" onClick="window.open('http://www.google.com','google','width=640,height=460')"/>
 </form>

Check this live example


For an empty window (not for tab), please use _blank

window.open('', '_blank', 'toolbar=0,location=0,menubar=0');
If you want to do it with a function,

<script type="text/javascript">
function open_new_window(URL)
{
NewWindow=window.open(URL,"_blank","toolbar=no,menubar=0,status=0,copyhistory=0,scrollbars=yes,resizable=1,location=0,Width=1500,Height=760") ;
NewWindow.location = URL;
}
</script>

Implimentation of this function Example

<a href="#" onClick="open_new_window('http://www.google.com');">google search</a>

<a href="#" onClick="open_new_window('http://www.yahoo.com');">yahoo search</a>

Set position of new window
screenX  number in pixels, the position of window from top. this code is for netscape browsers.
screenY  number in pixels, the position of window from left. this code is for netscape browsers.
top  number in pixels, the position of window from top. this code is for IE 4+. 4.
left  number in pixels, the position of window from left. this code is for IE 4+. 4.

Example Code

<form>
<input type="button" value="New Window!" onClick="window.open('http://google.com','google search','width=700,height=600,left=0,top=100,screenX=0,screenY=100')">
</form>


To close an opened window, use window.close();

Example code
<form>
<input type="button" value="Close Window" onClick="window.close()">
</form>

Read Article →

Darken An Image With CSS, JavaScript Or Jquery!

Assume you have an image in your web page and you want that to get darken when moue enter over that image.

What You will do?

  • Using Inline Css ans inline Javascript,you can darken an image.
  • Also,if  you want to do that with a fade effect, you can use Css and it will work in modern browsers,
  • To work in all major browsers, you can use jquery.

Here is the 3 ways to darken an image

  1. With Simple Inline Javascript + Css
  2. With Only Css.
  3. With the help of Jquery (It is the best) .

Simplest Effect With Inline CSS and JavaScript
Mouse Over and Opacity Will Change with inline CSS and JavaScript

<a class="darken" href="http://google.com/" style="background: black; display: inline-block; padding: 0;">
<img alt="Mouse Over and Opacity Will Change with inline CSS and JavaScript" onmouseout="this.style.opacity=1;" onmouseover="this.style.opacity=0.6;" src="https://blogger.googleusercontent.com/img/b/R29vZ2xl/AVvXsEify_lGIWF48wrBM8WqYvkJ4qJhmR12TWFEkOEE_Rlusa0UdOlyR1jJjKmROn0G4HGjVRXc3FIXw4A7PFgy-52ix-cf8yIWYCFxzFfgjeVfDF8HoTXUfIzyi2Qq2p2qv-1Xmw2bd8Hr8I0z/s1600/darkenimage.jpg" style="display: block;" width="200" />
</a>


Effect with CSS only (Only works with modern browsers)


<style>
a.darkencss {
    display: inline-block;
    background: black;
    padding: 0;
}
a.darkencss img {
    display: block;
   
    -webkit-transition: all 0.5s linear;
       -moz-transition: all 0.5s linear;
        -ms-transition: all 0.5s linear;
         -o-transition: all 0.5s linear;
            transition: all 0.5s linear;
}
a.darkencss:hover img {
    opacity: 0.7;
           
}
</style>
<a class="darkencss" href="http://google.com/">
    <img src="https://blogger.googleusercontent.com/img/b/R29vZ2xl/AVvXsEify_lGIWF48wrBM8WqYvkJ4qJhmR12TWFEkOEE_Rlusa0UdOlyR1jJjKmROn0G4HGjVRXc3FIXw4A7PFgy-52ix-cf8yIWYCFxzFfgjeVfDF8HoTXUfIzyi2Qq2p2qv-1Xmw2bd8Hr8I0z/s1600/darkenimage.jpg" width="200" />
</a>

Effect with jquery JavaScript.(Works in all commom browsers)

<style>
a.darkenjquery {
    display: inline-block;
    background: black;
    padding: 0;
}
a.darkenjquery img {
    display: block;
}
</style>>
<script src="http://ajax.googleapis.com/ajax/libs/jquery/1.8.0/jquery.min.js" type="text/javascript"></script>
<a class="darkenjquery" href="http://google.com/">
    <img src="https://blogger.googleusercontent.com/img/b/R29vZ2xl/AVvXsEify_lGIWF48wrBM8WqYvkJ4qJhmR12TWFEkOEE_Rlusa0UdOlyR1jJjKmROn0G4HGjVRXc3FIXw4A7PFgy-52ix-cf8yIWYCFxzFfgjeVfDF8HoTXUfIzyi2Qq2p2qv-1Xmw2bd8Hr8I0z/s1600/darkenimage.jpg" width="200" />
</a>
<script>
$('.darkenjquery').hover(function() {
    $(this).find('img').fadeTo(500, 0.5);
}, function() {
    $(this).find('img').fadeTo(500, 1);
});
</script>


Read Article →

Copy file from remote server url to our own server


Here is how we can Save a file from url using PHP.

<?php
$file = 'http://somewebsite.com/somefile.avi';
$newfile = 'video.avi';

if (!copy($file, $newfile)) {
    echo "failed to copy $file...\n";
}
?>


Code Explained

<?php
$file = 'http://somewebsite.com/somefile.avi';  //Store the path to remote file to variable $file.
$newfile = 'video.avi'; //Declaring  where and in what name the remote file to be saved on our server.

if (!copy($file, $newfile)) { //Checking if there any errors in copying if do
    echo "failed to copy $file...\n"; //Displaying a message in page as "Copy failed".
}
//if there is no errors, the file will be copied when the page loading ends.
?>


PHP Function used

copy()

Read Article →

Redirection using php and javascript

Here is how you can redirect your current page to a  new declared url. suing php and javascript at the same time.
If you are using this script in iframe, it will help you to open page in the parent page,and not inside the iframe.

<?php
$redirecturl='http://aslamise.blogspot.com';
echo "<script type='text/javascript'>window.open('$redirecturl', '_parent', '')</script>";
?>


Code Explained

<?php
$redirecturl='http://aslamise.blogspot.com'; //Assigning the redirect url
echo "
<script type='text/javascript'>
window.open('$redirecturl', '_parent', '')//Window.open = Opening the window in the specified address
                                                            $redirecturl= The Url we assigned just before.
                                                             _parent =opening on the main.even if the script goes inside iframe-
                                                              It will be opened in main window and not inside iframe.
</script>
";
?>

Javascript function used

window.open()

Read Article →

Extract a zip file using php


Here is how you can extract a .zip file using php on your server.
Change zipfile.zip to the name of your zip file.
Declare the path ,the contents to be extracted to. if not specified, it will be in root directory

<?php
$zip = new ZipArchive;
$res = $zip->open('zipfile.zip');
if ($res === TRUE) {
  $zip->extractTo('./');
  $zip->close();
  echo 'Success!';
} else {
  echo 'Failed';
}
?>

Code Explained


<?php
$zip = new ZipArchive; //Storing the filetype and format to variable to $zip.
$res = $zip->open('zipfile.zip');  //Trying to open .zip file.
if ($res === TRUE) { //If Opening .Zip file is success,
  $zip->extractTo('./'); //extract the contents to specifed folder.
  $zip->close(); //Closing file.
  echo 'Success!';//Dispaling text "success!" on the page.
} else { //If Opening of .zip file fails, then
  echo 'Failed';// Displaying a message "Failed". on the page.
}
?>


Read Article →

Delete a folder using php


You can delete a folder using this php script
Change the DIRECTORY to the directory you want to delete.

<?php
$dir='/DIRECTORY/';
rmdir( $dir );
?>

Code Explained


<?php
$dir='/DIRECTORY/'; //Storing the directory path to variable $dir.
rmdir( $dir ); //Removing Directory
?>


Function Used 

rmdir() 

rmdir() used to remove the directory


Read Article →

Delete files in a directory older than a specific time using php


Here is how you can delete all files in a folder those are older than a specific time,using php.

Change DIRECTORYNAME to the name of  directory which you want the contents to be deleted.
Copy and paste this to any text editor. save as .php file.upload to your server.

<?php
$DIR = './DIRECTORYNAME/';
if ($handle = opendir($DIR)) {

// This is the correct way to loop over the directory.
    while (false !== ($file = readdir($handle))) {
        if ( filemtime($DIR.$file) <= time()-60) {
           unlink($DIR.$file);
        }
    }

    closedir($handle);
}
else
{
echo "cannot open dir";
}
?>


Code Explained

<?php
$DIR = './DIRECTORYNAME/'; //Storing directory path to variable $DIR.
if ($handle = opendir($DIR)) { //Checks whether there is any errors,(read and write permission)-or
                                                 directory exist.
// This is the correct way to loop over the directory.
    while (false !== ($file = readdir($handle))) {//Looping over files till the last one.
        if ( filemtime($DIR.$file) <= time()-60) {//Checking  filemtime(file modified time) of each time and
                                                                    checks whether its lower or higher than the specified time,if it is
                                                                    lower ,then
           unlink($DIR.$file);//deleting the file.
        }
    }

    closedir($handle); //Closing the directory
}
else//if there is any error with folder, then-
{
echo "cannot open dir"; //Displaying the error message 'Cannot open dir'
}
?>

Function Used

unlink()

Unlink() used to remove the file.


Read Article →

Count files in a directory using php


If you want to count how many files are in there in a folder using php, you can use this script.
Copy This script, Change DIRECTORYNAME to the directory you want to count files, then save it as a .php file, upload to your server.

<?php
$directory = "DIRECTORYNAME";
if (glob($directory . "*.*") != false)
{
 $filecount = count(glob($directory . "*.*"));
 echo $filecount;
}
else
{
 echo 0;
}
?>

Code Explained


<?php
$directory = "DIRECTORYNAME";  //Saving directory path to variable $directory.
if (glob($directory . "*.*") != false) //checks whether there is ANY files inside. if yes-
{
 $filecount = count(glob($directory . "*.*")); counting the files using "count" function.and save result
                    to  $filecount
 echo $filecount; //displays the result .
}
else //if there was no files,
{
 echo 0; //displaying a 0.
}
?>


Function used

count();

count fuction is use to count the files.

Read Article →